CLICK HERE FOR FREE BLOGGER TEMPLATES, LINK BUTTONS AND MORE! »
Showing posts with label gift. Show all posts

Thursday, February 26, 2015

Altered Altoid: Mini-Prayer Journal Album

The glitter glue on the front of this altered box is still wet, but I loved the 
finished product SO Much I had to publish today,

I accidentally stumbled on this Altoid mini-album. If you follow me at all you now how much I love altered tins and boxes.  I never throw small containers away and 
I've even taken to asking people to save their containers for me!

I decided this would be a pocket prayer journal.  Start with a clean empty Altoid container or a container of your choice.  Trace the top of the continer on the WRONG side of you DSP so no pencil lines show.  Cut out 3 of these.  


Next, Cut 11 2 x 3.5 base "cards" which will be the foundation pages of your mini-album, I rounded the corners using the corner punch.  Any coordinating color will work.  I used Very Vanilla but you could use colored card-stock or alternating colors.

Lay them our with about 1/8 inch between 5 cards and 2 1/4 inch between the last card.


Cut 2 lengths of 15 inches of coordinating ribbon.

Lay out 6 cards and adhere the ribbon to the top and bottom of the cards.  I used sticky strips AND stapled alternating top and bottom ribbons for additional security.  You will have to cover the staples IF you don't want them to show or you could incorporate them into your page.  You could also sew the ribbon to the card-stock for some added interest.
Repeat with the 2nd ribbon

Next adhere the other cards to cover the ribbon.  I used tombow to assure a good seal.

Note that ONE card was NOT covered.  This will be placed ribbon side down on the interior of the container.  This example shows 6 plus one (but it was too thick with all my embellishments so I recommend you use only 11 cards--5 sets and one base)


Begin decorating the cards-both sides.  I used leftover pieces of Designer Series Paper.  This was a great project to use up small pieces of DSP since I NEVER throw anything away.  I used a flower punch from Michael's, the Banner punch, glitter glue (also from Michael's) and buttons.
I made 11  cards.


Scallop and Oval Punch

Banner Punch


This is what is seen when you open the box

Fold the pages accordion style 

I used assorted stamp sets I had on hand and suggest that you COULD use Blessed by God, Trust God, Chalk Talk, Label Love, Perfect Pennants, Teeny Tiny Wishes, Four Frames, And Many More, That's the Ticket, Really Good Greetings, Thoughts and Prayers, For your Country  or Petite Pairs,   Stamps sets used are dependant on the type of box you are making...

This could be altered for Birthday, New Baby, Weddings, Sympathy Graduations, Military etc.  The idea is limited only by your imagination!  Check back for other samples

 Here's the finished product.  


This was my inspiration.  I have altered the dimensions as they did not fit my Altiod container properly.  http://scrappingservant.blogspot.com/2010/05/altoid-tin-mini-album.html

Check back for more altered Boxes.  
Happy Stampin'
Diana


Monday, February 16, 2015

Sophisticated Serifs-J

I made this set of 4 note cards for my friend Julies-January Birthday.  
Everyone can use a set of monogrammed Note cards,  
The floral pattern allowed me to use several colors 
(Crisp Cantaloupe, Chocolate Chip and Soft Sky) 
and brought a much needed touch of spring to this winter birthday celebration

Here is a closeup of the Monogram, which I stamped in Chocolate Chip.  
The floral embellishment was colored using Calypso Coral and Old Olive Markers.

These are packaged in a cellphone sleeve and tied with coordinating ribbon.  Add a pretty pen and some stamps for an extra special gift for an elderly neighbor or nursing home resident.


The envelopes (not shown here) were stamped with the same monogram as above
 in the return address area. 
I liked these so much I am making a set for myself, as Christmas and Wedding Shower Gifts.

Happy Stampin!
Diana

Wednesday, August 20, 2014

Addicted to Journals

I had a request from a Stamp Camp Participant to teach a Prayer Journal Class.  And am I glad she ashed!

After spending some time I spent some time in my craft room today knocking out a few journals for a November craft show I participate in I've decided these are my new obsession Oh, My--I am addicted to creating journals as you'll can see by the many different styles in the next few posts.

 For this Prayer Journal I used stippled blossoms and Skinny Mini Alphabet in Pool Party and Calypso Coral

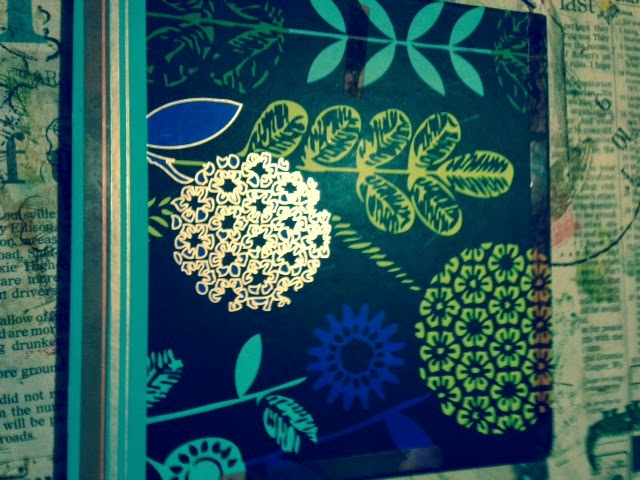
1)  Select a Journal that you wish to recover.  It can be a cheap one from the dollar section of your local craft store or a composition notebook if you want one that is larger (on sale at back to school sales of only 50 cents!)  This was a chipboard cover and measured 6 x 6.

2)  Choose your paper(s).  Because the 12 x 12 paper was a tad short I had to trim the front with coordinating Designer Series paper.

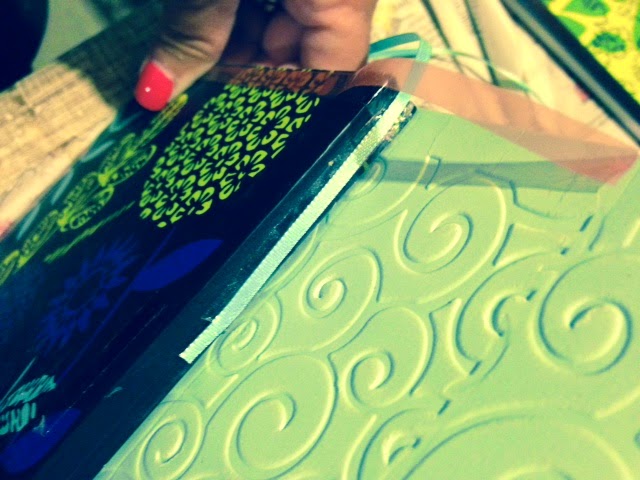
3)  I embossed the Pool Paper for some added interest.


4)  I added a ribbon to the spine to use as a book mark.  Be sure to add this before you begin to adhere the paper.

5)  Adhere the paper using stick strip

6)  Stamp the Stippled blossoms using Chocolate Chip and Calypso Coral and Tangerine Tango and Tempting Turquoise.  The leaves were stamped in Old Olive.  Cut out.

7)  I used Skinny Mini Alphabet to stamp the words Prayer Journal in Old Olive.  I cut out the oval using the Oval Framelits and sponged the edges in Chocolate Chip.  I used a clear block that has a guide so I can line the letters up perfectly.  You have to place the letters on the block in REVERSE order...Stamp once to make sure they are lined up to your satisfaction before you stamp on your project.


I think these will make great gifts for my Tuesday Morning Bible study ladies.  
Beautiful!

Happy Crafting!
Diana


Thursday, March 6, 2014

Prayer Box

I save all kinds of items thinking that they may come in handy one day for a craft Project.  And I was right!  This is created from a discarded ALTOID Box and I call it my prayer box.

Select paper that coordinates with the exterior of the box
Trace around the box on the WRONG side of the decorative paper and cut out on the OUTSIDE of your traced lines.
Line the Top and bottom of the box with Sticky Strip.  CAREFULLY place your decorative paper on the sticky strip and press out toward the edges.  Trim away any overhang using your paper snips.

For the Prayer Box label I typed the words on a word document using different colors and fonts and printed it out.  Be careful to leave enough room between each row so you can CUT between them, making it easy to use your punch.

For the Interior I typed the verse in Word using different colors and fonts.  I was able top get 6 on a page.
The verse reads 
When your Head Starts to Worry
and your Mind just can't Rest
put your Prayers down on Paper 
and Let God do the Rest
The note pad was purchased at Target in the dollar section.  I have also used post it notes but the correct size and color can be difficult to find,  Another favorite way to create papers is to use the  Label Framelit and cut out of coordinating papers.  


The pencils were purchased at Office Depot and are GOLF pencils.  This was the MOST expensive part of this gift (and I have 249 more!  LOL)

The exterior is decorated with a ribbon.  Trim the outside with Sticky strip and attach.  I secure the "seam" with some Tombow too.  

I'll post other examples! 
 In the mean time...what are you reading this Blog for--Get Craftin!
Diana


Friday, March 1, 2013

Life is Fragile...Handle with Prayer Journal

 
I didn't have any photographs of my recent cards available so I decided that I would add a Journal I made using the 2 step bird punch in honor of all the robins that are reminding me that Spring is surely near!  Even though it was snowing here this morning!
 
This is a store bought chipboard journal covered with decorative paper.  It's an easy to make gift, taking only about 15 minutes from start to finish. 
 
Line the journal with double sided tape.  Remove tape backing and CAREFULLY place on your decorative paper.  Trim away unnecessary paper and decorate with embellishments of your choice.  VIOLA!  Instant gift.  
 
I sold these beauties at a craft show for $8 and the literally FLEW off the shelf. 
Happy Crafting
Hugs, Diana