CLICK HERE FOR FREE BLOGGER TEMPLATES, LINK BUTTONS AND MORE! »

Thursday, February 14, 2013

Sweets for the Sweet!

Here is the CARD I created fro my Dear Husband Gary!
Just a foam board with a message written with candy bars as part of the message.
Here is a larger picture of the CARD!  I didn't have the message planned when I bought the candy so I just let the candy bars dictate the message.
 It reads:
Honey, when we first met you were probably hoping to SKOR. 
We never thought our life could be so NUTTY. 
It's been filled with JOY and some SOUR PATCHES. 
You still send me into ORBIT to the MILKY WAY. 
YOU make my heart BURST and you always make me SNICKER, 
Don't try to make  a FAST BREAK this PAYDAY. 
We were MENTOs be together 
We make a perfect DUO
 
I received this beautiful bouquet, balloon and some Schimmps candy (delicious!) plus a card that brought tears to my eyes!
 
Hope you have a beautiful day filled with LOVE!

Friday, February 8, 2013

Love and Laughter

 
LOVE AND LAUGHTER
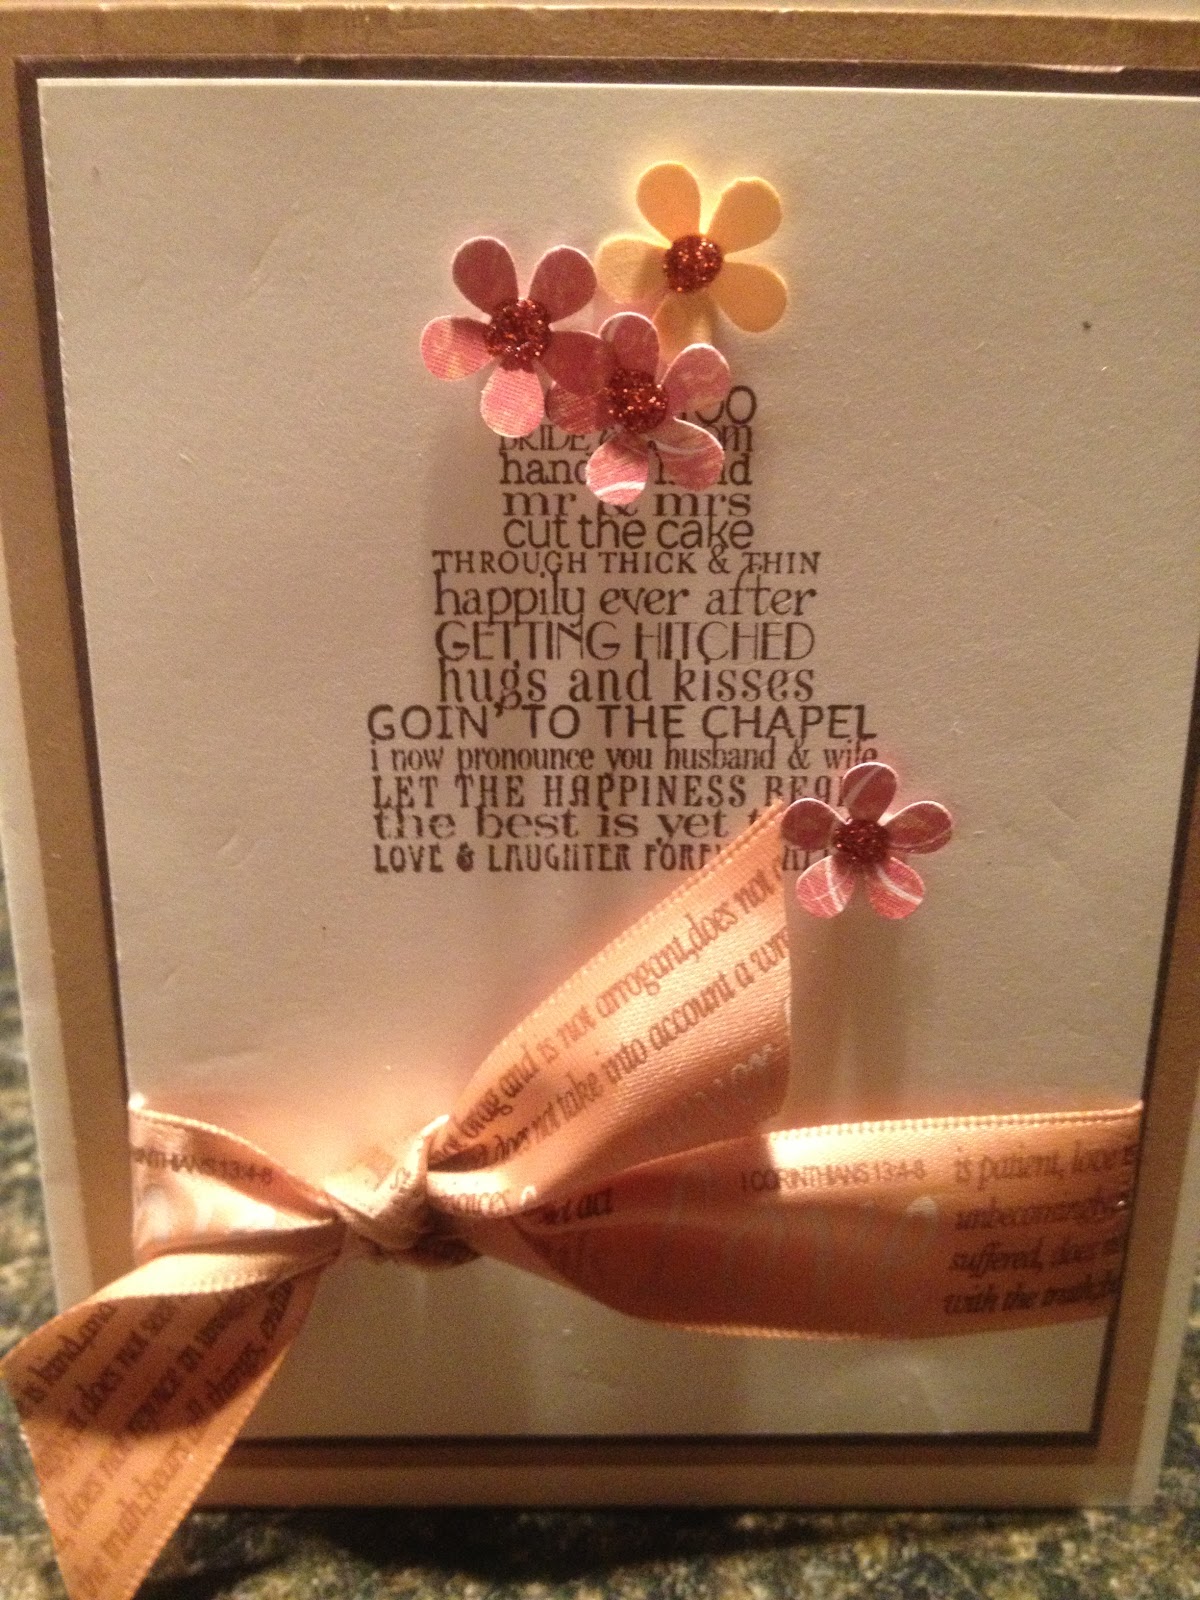
The Saint John Caring Card Club was gifted a TON of card stock, ribbon, embellishments and stamp sets recently (Thanks Kathy Williams!) so we put them to good use. 
This ribbon, salmon in color,  is printed with the 1 Corinthians 13 LOVE verse so we paired it with the Love and Laughter Stamp Set for a lovely Wedding Card.   
The card base is Crumb Cake and the accent card stock is chocolate chip.  The sentiment is stamped in Chocolate Chip on Very Vanilla.  Flowers we punched out of scrap DSP and embellished with glitter glue.  Lovely!

Tuesday, October 16, 2012

Topnote Scarecrow Card

We're making this guy at our next Caring Card Class.  But I don't think he'd scare any crows away...
Cut one 8 1/2 x 11 piece of Very vanilla in half along the short edge (pieces will be 4.25 x 11)
Fold in half and place folded edge slightly below the cutting edge on the TopNote die.  This placement assures you will have an intact card rather than 2 TopNote cuts.
 
Cut a decorative piece of paper using the Top note (this will make 2 hat TOPS) and then cu in half.  To create the "brim of the hat" you'll cut a decorative piece of paper into a 1" strip and then into a 4" length.  I trimmed the edges with a corner punch for a little interest. 
 
The nose was made using the 1" square punch (a scrap of Cherry Cobbler) , cut in half
and the eyes (basic black) were made using the same punch-cut in half and
then in half again to get the smaller triangles.
I used a Basic Grey marker to create the stitching on the eyes and nose and drew on a squiggly mouth.  Googly eyes completed his sweet face.
 
I glued raffia strips behind the hat and then attached the hat to the TopNote base.  THEN i trimmed the raffia to assure I got the look I wanted! 
A Bird punch in More Mustard finished him off!
 
I did not edge the very vanilla TopNote base...but I think I will go back ad add that for some additional interest!


Monday, October 15, 2012

Love and Laughter

Recently our Card club was gifted TONS of card stock, stamp sets, ribbon and embellishments.  Thank you Kathy!  One of the cards I created from the stash used some ribbon printed with the LOVE Verses from 1 Corinthians 13.  The card is triple mounted and embellished with a couple of punched flowers and some glitter glue.  So Simple, So Elegant!

Tuesday, August 28, 2012

Googly

I made this Card for a recent swap. 
I love the Cottage Window for it's versatility
and the Googly's are just so darn cute and fun to use. 
 
 
This card has a Very Vanilla Base and I
embossed Pumpkin Pie with the NEW Wood Grain embossing folder. 
The cottage window is stamped with Basic Black, as are the bats. 
I bent up the bat wings to give the illusion they were in flight. 
Frankie is stamped with Lucky Limeaid to coordinate with the ribbon,  BOOO is stamped with Pumpkin Pie and mounted on a black scallop. 
 
You'll be seeing a lot of these stamp sets on my cards in the coming weeks!


Thursday, August 23, 2012

Papaya Sympathy

I've been practicing with the PAPAYA COLLAGE stamp set recently.  I struggled a bit with the stams to find a look that was pleasing to me but once I found my groove I was hooked. 
 
This 3 layer card is stamped on Very Vanilla and Basic BLack.  It is stamped with Basic Black, Soft Suede and Crumb Cake .  I cut out the butterflies and mounted them with a dimensional, folding up the wings just a bit to give them some definition.  I added a couple of pearls to their bodies and added a Crumb cake ribbonto complete the look.   VIOLA!  What a Beautiful card. 
 
I'll post some of my other attempts at using this stamp set in the next few days.  Stay Tuned!
 

Friday, January 27, 2012

Button Buddies

I had received a cute button buddies card front in a swap I recently participated in and used that as the basis for an upcoming stamp class.

Each card base is 3.5 x 3.5 inches
the "middle" card stock layer is 3 x 3 and the stamped layer is very vanilla cut 2.5 x 2.5
I inked most of the edges of the very vanilla with a coordinating color to create depth and interest. Each sentiment is stamped using the Teeny Tiny Wishes set (expensive but very versatile and a must have for serious stampers!) the modern label punch and the word window punch.

 
This little piggy is ready to party!  His hat was created using Pennant Parade.  Card stock is Melon Mambo and Lucky Limeade.  I made the button nose using Sweet button embosslits die.  Cute Huh?
 
What a cute way to say...slow down!  Colors are Marina Mist and Garden Green.  This one uses a real button from the Regals collection.

Get well wishes uses some non-Stampin' Up stickers, Cajun Craze and Crushed Curry (retired) papers. 
 
I love this corduroy button as an embellishment!  I added a punched pat that I had "glitterized" to another card I made!  Very cute!


Here are the remaining cards...


and as a set
Happy Stampin"
Diana